Overview
This article dives into three primary Form Field Families—Basic, Static, and Contact—and how to use them effectively in your form setup.
Locating Form Fields
To get started with field customization:
-
Go to your Manager Dashboard
-
Click the Forms tab in the left menu
-
Select a created form or choose Start from Scratch
-
On the Form Editor page, find the field types on the right-hand side
-
Hover over any field to view its name, purpose, and preview
🧩 Basic Fields
These are your standard data collection tools and are used in most forms.
|
Field |
Use Case Example |
|---|---|
|
Short Text |
“Please list any food allergies” |
|
Long Text |
“Tell us more about yourself in 400 characters or less” |
|
Checkboxes |
“Check all that apply…” |
|
Radio Buttons |
“Select a preferred service time” |
|
Dropdown |
“Choose a T-Shirt Size” |
|
Date |
“Date of Birth” or “Last Vaccination Date” |
|
Numbers |
“On a scale from 1–10…” |
|
Letters |
“Preferred Nickname” |
|
File Upload |
Upload signed forms, medical records, etc. |
|
Digital Signature |
For liability waivers or authorization |
|
Slider |
Feedback or rating scales |
💵 Want to collect dollar amounts? Use one of the Payment Fields instead.
📌 Static Content Fields
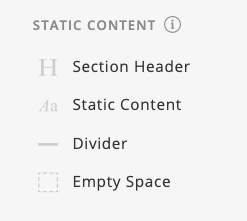
These are used for layout, visuals, or instructional text—not for data collection.
|
Field |
Description |
|---|---|
|
Section Header |
Bold title for new sections |
|
Static Content |
Add formatted text, images, or instructions |
|
Divider |
Horizontal line to break up sections |
|
Empty Space |
Visual buffer between sections |
📷 Use Static Content to include images of items or instructions throughout your form.
📇 Contact Info Fields
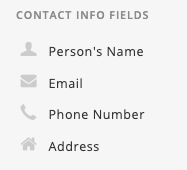
These are preset questions designed to collect individual contact information.
|
Field |
Description |
|---|---|
|
Person’s Name |
First and last name fields |
|
|
Validates email format |
|
Phone Number |
Includes area/country code |
|
Address |
Full address layout with city, state, ZIP |
👥 Collecting for multiple registrants? Use the Person Field Set instead.
⚙️ Options for All Field Types

Each field includes a Field Property Box with two key customization tabs:
-
General Info: Edit the field name, placeholder, help text, and required status
-
Conditions: Show the field only if specific responses are selected (e.g., “Select a size” appears only if someone selects “Yes” for “Buy a T-shirt”)
🛠 To edit a field after it’s placed, click the gear icon on the right corner of the field.
📬 Email Placeholders
Most fields automatically create a placeholder token used in email notifications.
These tokens pull the submitted values into confirmation messages or receipts.
Example: If a payment field is added, its placeholder adds a receipt line in the donor’s confirmation email.
Updated